CapCut Pro APK Download V14.1.0 (Pro, Premium APK)

| App Name | CapCut Pro APK |
| Size | 285 MB |
| Version | V14.1.0 |
| Last Update | Today |
| Developer | Techdailytimes. Ltd. |
| License Type | free |
| Requirement | Android 5.0 Or Above |
| Software Category | Video editing and player |
| Worldwide Downloads | 500M+ |
| Features | Pro Unlocked, No Watermark |
| Rating | 4.5 |
Struggling to find a professional video editing app that truly delivers? Want to take your YouTube and personal videos to the next level with jaw-dropping effects like 3D zoom, picture-in-picture (PIP), and stunning 4K exports? Most video editors fall short—but not this one.
Meet CapCut Pro APK—your ultimate solution for effortless, high-quality video editing. Packed with pro templates, advanced filters, and premium features for free, this app works like magic, transforming raw footage into breathtaking cinematic content. It’s no surprise that countless creators swear by it.
Ready to elevate your video editing game? Download CapCut Prp APK today and unleash your creativity!
What is CapCut APK?
CapCut APK is a powerful and user-friendly video editing application designed for both beginners and professionals. Developed by ByteDance, the same company behind TikTok, CapCut offers a wide range of editing tools, effects, and transitions to create high-quality videos effortlessly. With its intuitive interface, users can easily trim, merge, and enhance videos with stunning effects, making it a popular choice among content creators.
What is CapCut Pro APK?
CapCut Pro APK is the premium version of the standard CapCut app, offering advanced features and unlocked premium tools for an enhanced editing experience. Unlike the free version, CapCut Pro removes watermarks, provides exclusive filters and transitions, and allows higher-quality exports in 4K resolution. It is ideal for professional video editors and social media influencers looking to create polished, high-impact content without limitations.
Features of CapCut APK
The standard CapCut APK comes with a variety of powerful features, including:
✅ Easy-to-use interface – Simple drag-and-drop tools for effortless editing.
✅ Basic trimming and cutting – Cut, merge, and adjust video clips with precision.
✅ Filters and effects – A collection of vibrant filters, transitions, and effects to enhance your videos.
✅ Music and sound effects – Access a vast library of background music and audio effects.
✅ Text and stickers – Add stylish fonts, captions, and trendy stickers.
✅ Free to use – Enjoy all these features without any subscription fees.
Latest CapCut Pro APK Features
The Pro version unlocks additional advanced tools that elevate your editing game:
🔥 No Watermark – Export videos without a distracting watermark.
🔥 Exclusive Effects & Transitions – Premium filters, cinematic transitions, and unique overlays.
🔥 4K Ultra HD Export – High-resolution export options for professional-grade videos.
🔥 Advanced AI Features – AI-powered background remover and face beautification tools.
🔥 Unlimited Keyframe Animation – Smooth, frame-by-frame animation for precise motion editing.
Keyframe Animation in CapCut
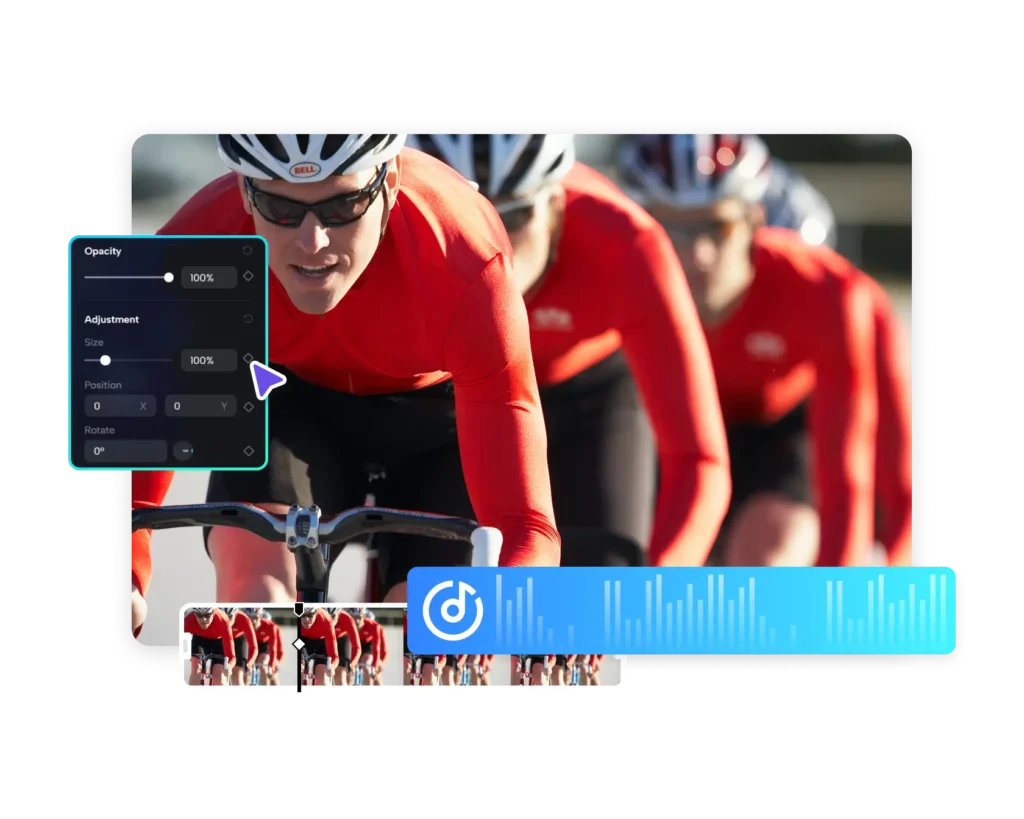
Keyframe Animation is a standout feature in CapCut that allows users to create seamless motion effects by setting keyframes at different points in a video. This feature is essential for smooth transitions, object movements, and dynamic text animations. With CapCut Pro, you can unlock unlimited keyframes to achieve professional-level motion graphics and animations.
Smooth Slow Motion Effect in CapCut
Creating a smooth slow-motion effect is a great way to add cinematic impact to your videos. Whether you’re highlighting an intense action scene or creating a dramatic moment, CapCut APK offers advanced tools to achieve professional-looking slow-motion without lag or choppiness.
How to Create a Smooth Slow Motion Effect in CapCut
✅ Step 1: Import Your Video
- Open CapCut and tap on “New Project.”
- Select the video clip you want to edit and import it into the timeline.
✅ Step 2: Adjust the Speed
- Tap on your video in the timeline.
- Select the “Speed” option from the editing menu.
- Choose “Curve” for advanced speed adjustment or “Normal” to manually reduce speed.
✅ Step 3: Apply Optical Flow for Smoothness
- If available, enable “Motion Blur” or use Optical Flow AI Technology to smooth out the slowed-down frames.
- Adjust the blur intensity for a more natural look.
✅ Step 4: Add Transitions and Effects
- Use keyframes to ensure a consistent slow-motion flow.
- Apply smooth transitions to blend frames naturally.
- Enhance with cinematic filters and background music.
✅ Step 5: Export in High Quality
- After perfecting the slow-motion effect, export your video in 60 FPS or higher frame rates to maintain smoothness.
Pro Tips for Ultra-Smooth Slow Motion
💡 Use High Frame Rate Videos – Record videos at 60 FPS or higher for better slow-motion results.
💡 Avoid Extreme Speed Reduction – Slowing down a video too much can cause frame drops. Stick to 50% or 75% speed for the best quality.
💡 Utilize AI-Based Enhancements – If available, use AI-powered motion interpolation for even smoother effects.
Video Stabilization in CapCut: Create Smoother Footage
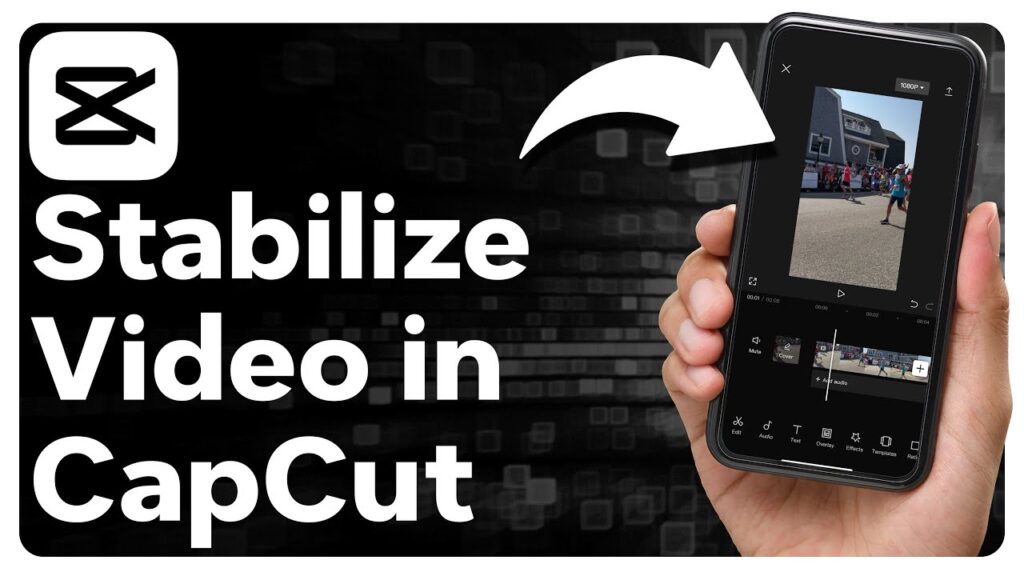
Shaky videos can ruin the overall viewing experience, making them look unprofessional and distracting. CapCut’s Video Stabilization feature helps you fix shaky footage effortlessly, ensuring smooth and polished video quality. Whether you’re shooting action-packed scenes or handheld vlogs, this tool enhances video stability without compromising quality.
How to Stabilize a Video in CapCut
✅ Step 1: Import Your Video
- Open CapCut and create a new project.
- Select and import the shaky video clip into the timeline.
✅ Step 2: Access the Stabilization Feature
- Tap on the video in the timeline.
- Scroll through the editing options and select “Stabilization.”
✅ Step 3: Choose the Stabilization Level
- CapCut offers different levels of stabilization. You can choose between Low, Medium, or High depending on how shaky the video is.
- Higher stabilization levels may crop the video slightly to ensure smooth motion.
✅ Step 4: Preview and Adjust
- After applying stabilization, preview your video to check the improvement.
- If needed, tweak other settings like motion blur or speed adjustments to enhance smoothness further.
✅ Step 5: Export in High Quality
- Once satisfied with the results, export your stabilized video in high resolution (1080p or 4K) for the best output.
Pro Tips for Best Results
💡 Shoot at a Higher Frame Rate – Recording at 60 FPS or more allows better stabilization without loss of quality.
💡 Use Minimal Cropping – Higher stabilization may crop your video slightly, so adjust the frame carefully.
💡 Combine with Slow Motion – Slowing down a stabilized video creates a more cinematic effect.
Glitch Effect in CapCut: Add a Futuristic Touch to Your Videos
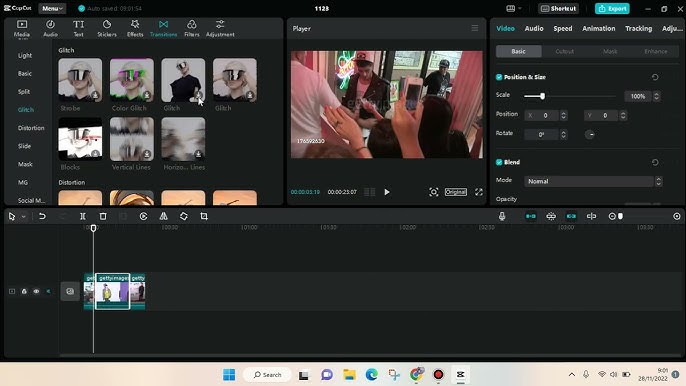
The Glitch Effect is one of the most popular visual effects used in video editing to create a futuristic, digital distortion look. Whether you want to add a cyberpunk vibe, tech-inspired transitions, or a glitchy horror effect, CapCut makes it easy to apply and customize this effect with just a few taps.
How to Add the Glitch Effect in CapCut
✅ Step 1: Import Your Video
- Open CapCut and start a new project.
- Select the video clip where you want to apply the Glitch Effect and add it to the timeline.
✅ Step 2: Apply the Glitch Effect
- Tap on your video in the timeline.
- Scroll to the “Effects” menu and search for “Glitch” under the “Distortion” category.
- Select a glitch style that best fits your video (e.g., RGB Split, Digital Glitch, TV Static).
✅ Step 3: Adjust the Intensity
- After applying the effect, adjust its intensity, duration, and speed using the effect settings.
- You can also use keyframes to make the glitch appear at specific moments for a more dynamic look.
✅ Step 4: Enhance with Sound Effects
- To make the glitch effect even more impactful, add glitch sound effects from CapCut’s audio library.
- Sync the visual glitch with the sound for a more realistic digital distortion.
✅ Step 5: Export Your Video
- Once satisfied with your edits, export the video in high quality (1080p or 4K) to maintain clarity.
Pro Tips for a Perfect Glitch Effect
Use RGB Split for a Classic Glitch Look – This effect shifts color channels to create a pixelated, broken TV screen effect.
Combine with Speed Ramping – Applying a slow or fast motion effect along with the glitch can make transitions more dramatic.
Layer Multiple Glitch Effects – Stack different types of glitch effects for a more complex, unique distortion.
Generate QR Codes in CapCut Pro APK
QR codes have become a powerful tool for sharing links, promotions, and digital content efficiently. If you’re using CapCut MOD APK, you might be wondering how to generate QR codes for your videos, branding, or personal use. While CapCut itself doesn’t have a built-in QR code generator, you can easily create and integrate QR codes into your videos using third-party tools and CapCut’s advanced editing features.